Create casetypes
In addition to casetypes that represent things and processes, you can also use casetypes to create and manage pages (such as your application's homepage) and system services (such as integrating with a calendar service). This guide is about standard casetypes. For more information about pages and system services, see Display content to users and System services respectively.
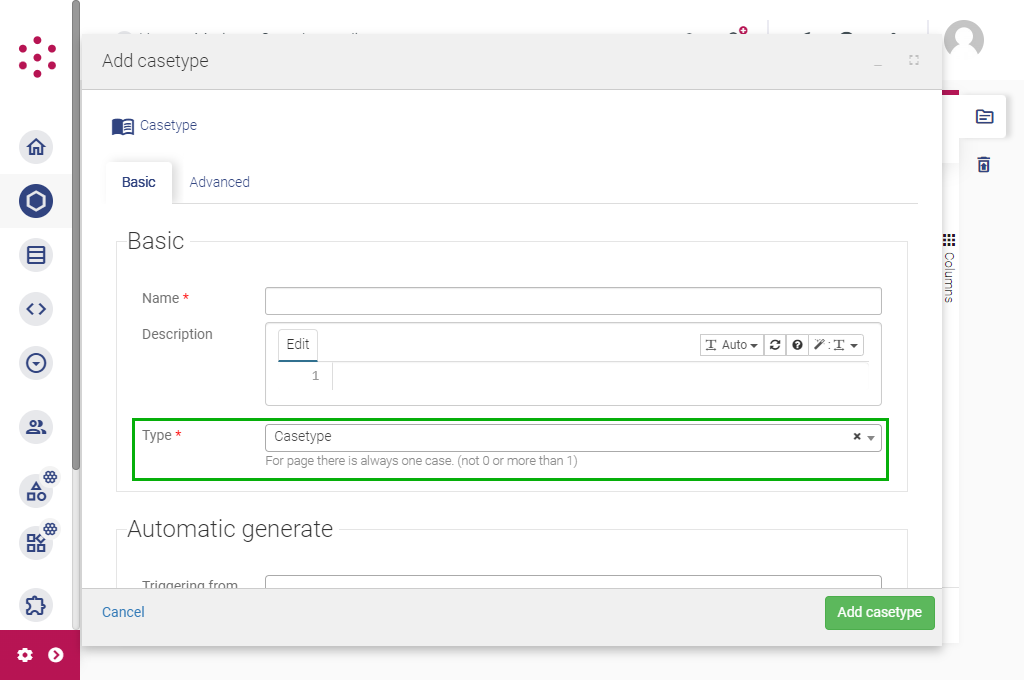
You create and manage your application's casetypes from the Casetypes page in your Studio. To add a new casetype, you only need to specify the name and set the Type to Casetype. Leave the settings on the Advanced tab blank initially. You can edit these settings later if required.

By default, new casetypes are created with a Start <casetype> form. You will need this when you set up a casetype activity so that you can add individual cases to your application. To create additional forms and activities, select the appropriate options under Quick add:
- Add activity: Generate a casetype activity to add cases of this type from the selected parent casetype, such as adding orders to a customer.
- Edit activity: Generate a form and activity to edit the case attributes after a case has been created.
- Close activity: Generate an activity to close individual cases. For example, you may want to indicate that a claim has been paid or that a user is no longer active.
- Result form: Generate a form that is populated with the case data automatically when a case is closed.
Once you have created the casetype, you can configure these activities and forms as required, including granting users rights to perform them or triggering them automatically. You can also add forms and activities to a casetype after it has been created.
Add attributes to a casetype
Attributes define the characteristics that can (or must) be recorded for each case of a particular type. For example, a Product casetype might include attributes for details you want to display in your application, such as a Name, Description, and Price. Similarly, a Dispatch order casetype might include the details required to complete that process, such as the Recipient name, Recipient address, and Delivery service. In addition, each case has various pieces of metadata - including a unique identifier called a case ID - which are populated automatically.
Although each case is uniquely identifiable by its automatically generated Case ID, it is good practice to include an attribute for a human-readable name or description to help users differentiate cases. For example, if you want to allow users to select an existing customer from a list, displaying a human-readable name is more user-friendly than displaying a case ID.
You will almost always want to create other attributes to store different types of data relating to each case.
There is no limit on the number of attributes that you can add to a casetype. However, to keep things manageable we generally recommend adding no more than 30 attributes per casetype.
You can add and manage attributes from the Attributes tab of a particular casetype.

To create an attribute:
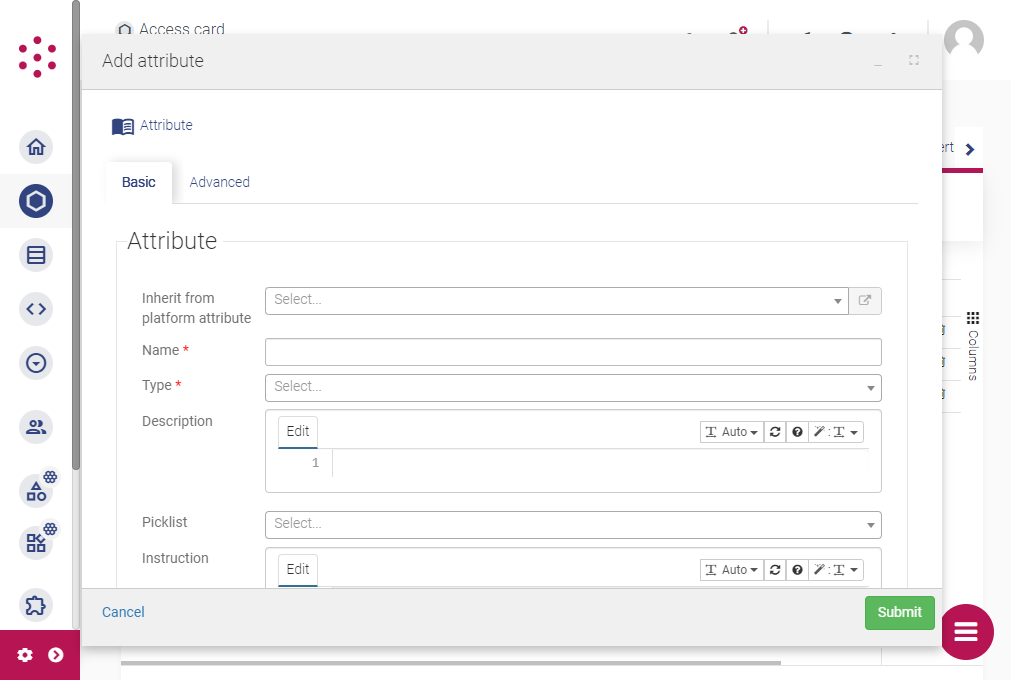
- Specify a Name. We recommend keeping attribute names short but descriptive so that users can easily understand the information that is being requested (on a form) or provided (in a widget displayed case data). (Note that the Description field is only for use within your Studio.)
- Select either a Platform attribute to use as a template for the casetype attribute or select the attribute Type based on the type of data you want to store (such as text, a date, or a number).
- Configure other settings or override the settings inherited from the platform attribute as required.
- You can use the Instruction and/or Tooltip fields to provide users with additional information about the data that should be provided. This is useful if you apply a validation rule to the attribute.
- For most data types you can specify a default value to populate the attribute automatically each time a new case is created.
- By default an attribute can only hold one value. Enable Multivalue to support multiple values. For example, you may want to allow users to select multiple related cases or upload multiple files.
- To derive the attribute value from other data in your application, open the Advanced tab, enable Computed attribute and use an inline template to define the source of the value. For more information about when to use computed attributes, see Populate case details automatically.
For more information about attribute settings, see Attributes.
Once you have created an attribute, you cannot change the attribute type, multivalue setting, or whether the attribute is computed.
Set the casetype reference
The metadata for each case includes a Reference field. By default, the reference field contains the case ID. You can change this to a custom format using an inline template. For example, you might want the reference to contain the value from a Name attribute followed by the Date created (from the case metadata). You can display the reference in various places within your application, including picklists, grid widgets, and the browser tab title when viewing a case.
To set the format for the reference, click the pencil icon at the top of the casetype page to open the Edit casetype dialog and then open the Advanced tab. To include an attribute value, type case. and select an attribute from the list. To include a value from the case metadata, type casemeta. and select a metadata field from the list.
The new reference format is applied to new cases automatically. If you have already added cases of this type to any of your DTAP environments, you can use Developer Tools to recalculate the cases and thereby update the case references.
Next steps
Once you have created a casetype and added attributes to store the case data, the next step is to make it possible to add cases to your application. Adding cases can cover anything from adding products to an inventory, processing orders, or inviting users to log in so they can use the system.