Edit case details
For standard casetypes that represent things (such as a customer, order, or claim) or processes (such as sending an email or inviting a user), it can be useful to give users the option to edit the details of existing cases.
For example, you may want to give users an option to edit attributes that were set when the case was created (such as changing a user's email address) or a way to add further details that were not required on creation (such as adding details to an insurance claim or adding a custom message to an automated email before sending it).
To allow your users to add or edit attributes for an existing case, you need to configure a form activity and an associated form:
- The activity determines who has permission to edit the case attributes (via the form). Activities can include rules to populate form fields automatically and automate other behavior. They can also have deadlines to ensure that activities are completed within a specific time frame.
- The form defines the GUI that users will use to edit the case attributes. This can be the same form that you use to create new cases of that type, or a dedicated form for a particular activity.
Add an activity to edit case attributes
Form activities are added to the casetype for which you want to update the attribute values. This can be a standard casetype, a system service, or a page casetype. From your Grexx Studio, open the casetype, select the Activities tab and click Add activity. Set the activity Type to Form.
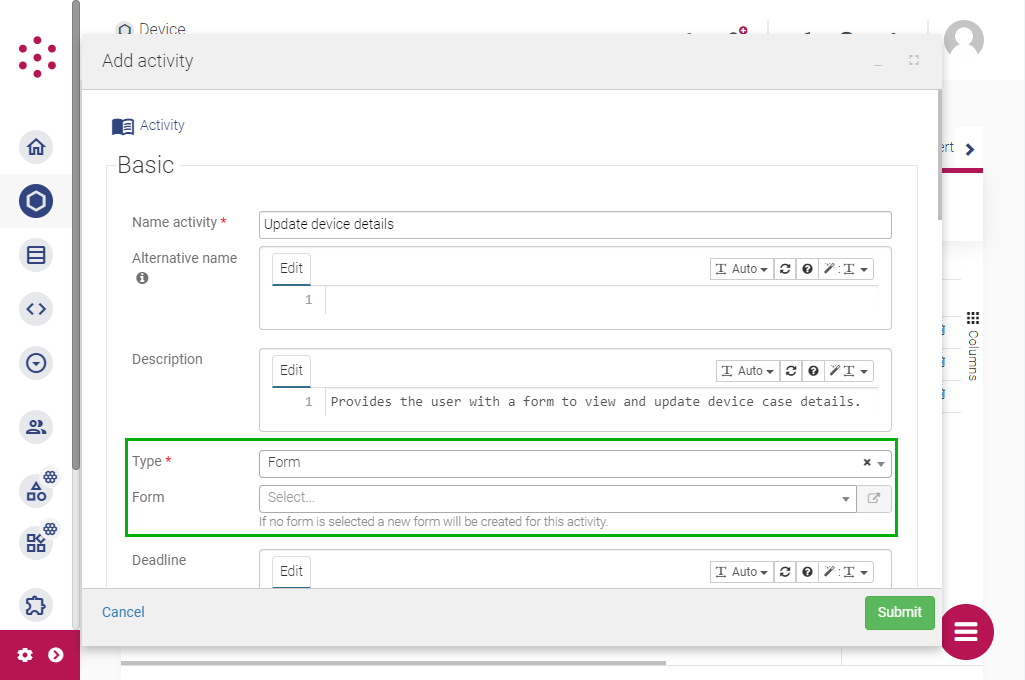
When you add a form activity to a casetype, you can either select an existing form for the activity, or leave the Form field blank to generate a new form with the same name as the activity automatically.
Once you have created a form activity, you can add mappings and other rules to the activity. Use the Designer tab to configure mappings, triggers and/or conditional logic for the relevant stage in the activity lifecycle:
- To populate the form fields with the existing attribute values, enable the global mapping (
All casedata > All task in) or enable Automap in from the activity properties. This is useful if you want users to be able to see the values currently stored on the case before they edit them. If you only want to display some values without allowing users to change them, use the form designer to make the relevant field(s) read-only. - If you only want to populate some form fields, disable the global mapping and add mapping rules for the relevant fields to the
On startstage of the activity:- Set the mapping To option to Task in and then select the form field that you want to populate. This can be a field mapped to a case attribute or a bare form field.
- Use the mapping From option to select the source of the data. For example, to fetch current attribute values, select Casedata and then select an attribute. To fetch data from a related case, use an inline template. To populate a multivalue attribute with the case IDs of cases in a dataset, select Dataset.
- To replace the existing value with the mapped value, keep the default mapping operator,
=. Depending on the data type, you can also apply other mapping operators to add or remove values, or perform mathematical operations.
- Usually, you will want to update the case attributes with values from the form when the form is submitted. Enable the global mapping (
All task out > All casedata) or enable Automap out from the activity properties to map the data from all attribute fields to the case attributes.
Alternatively, you can disable the global mapping and add mapping rules to theWhen donestage. Set the mapping From option to Task out and select the individual form fields. Set the mapping To option to the appropriate case attributes. - To perform another activity when a user submits the form, add a trigger to the
When donestage. Similarly, to perform another activity when a user opens the form (regardless of whether they submit it), add a trigger to theOn startstage. For more information about adding triggers, see Chain activities together. - If you only want to apply a mapping or trigger when certain conditions are met, apply conditional logic to the activity.
Design a form for editing case attributes
Once you have created the activity, the next step is to configure the form. When you created the activity, you will either have chosen to reuse an existing form (such as the Start <casetype> form) or generated a dedicated form for the activity.
Reusing an existing form is useful if you want to make the same fields available to users in different situations, such as both when creating and editing a case. If the attributes that you want users to be able to edit are specific to the activity, a dedicated form is the better option.
To edit the form, open the casetype, select either the Activities or Forms tab, and then click the form name.
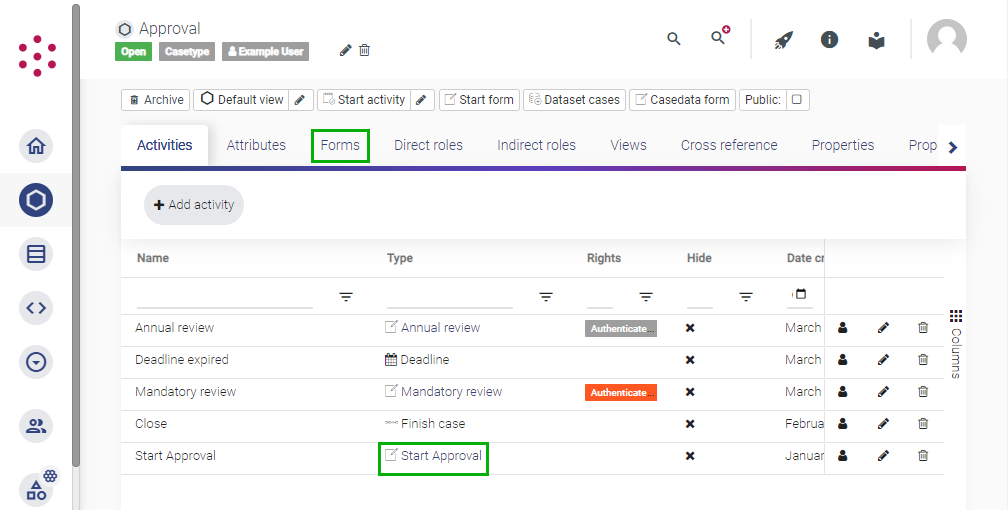
Open the Form designer tab to view the form design. Ensure the form contains the attributes that you want users to be able to populate or change:
- From the toolbar, use the Select attributes dropdown to select one or more attributes.
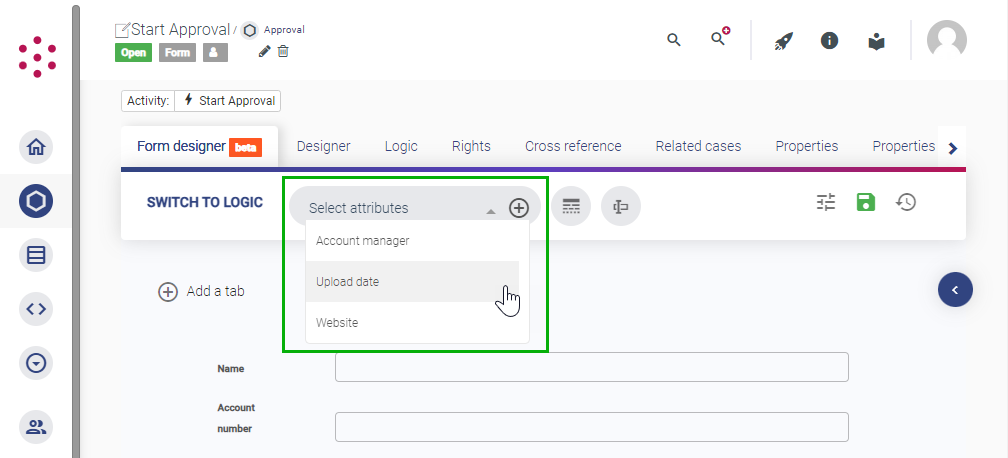
- Click the + icon to add the attributes to the canvas.
- Drag and drop fields to change their order and relative sizes.
- To change a field's visibility or make the field mandatory, select the attribute and make changes via the right-hand panel. You can also override the attribute settings for the purposes of the form, including changing the label, adding or editing the instruction, or applying a validation rule.
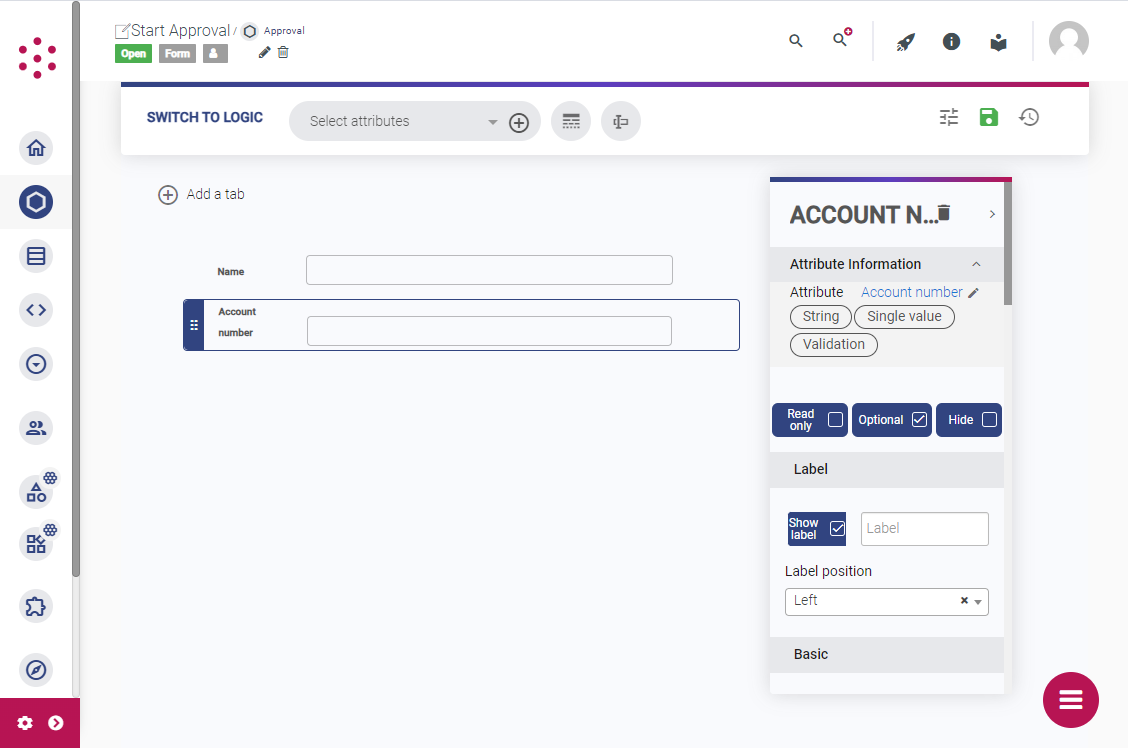
To collect information without storing it on the case, add "bare" fields to the form. For example, if you want to add conditional logic to the form to control whether an attribute field is displayed, you can add a form field to ask a gating question and then apply logic based on the value that the user enters.
To add a bare field to a form, click the field icon in the toolbar and then use the right-hand panel to select the data type and configure the field.
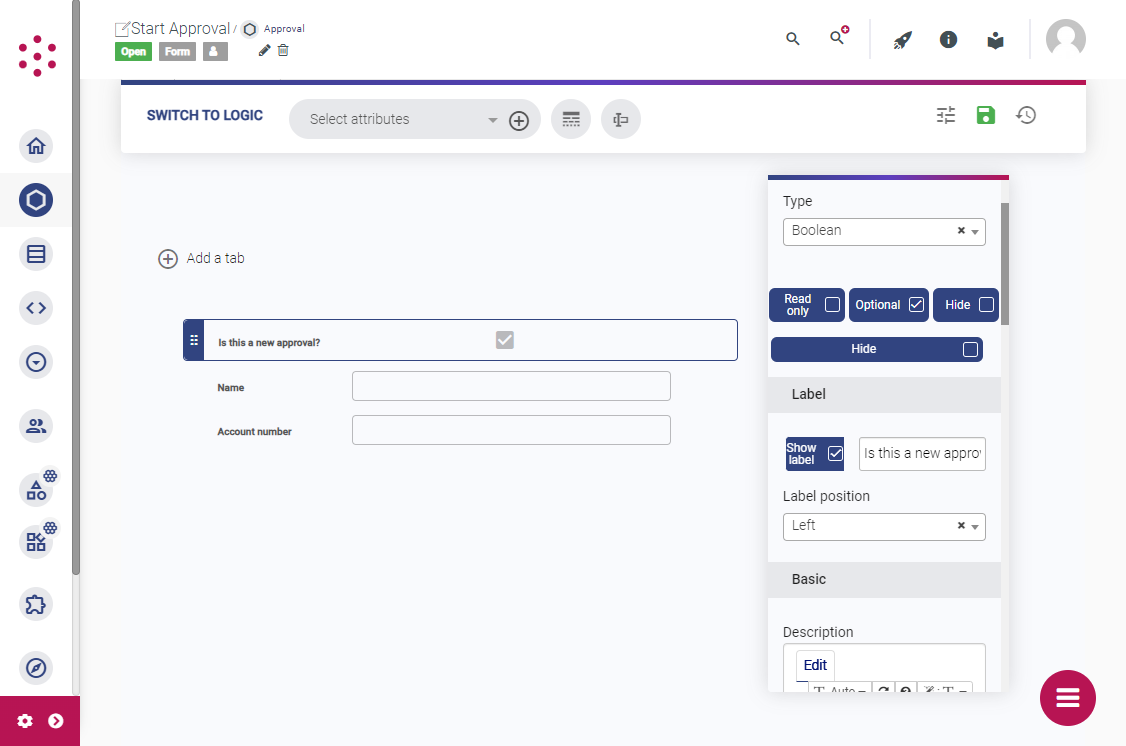
For more information about designing forms, including how to change the form layout and styling, see Configure forms.
If you include an instruction on the form, this is displayed in preference to any instruction text you specified in the activity properties.
Grant permissions
Once you have added the activity and set up the form, you need to give users permission to edit cases by granting rights to the form activity.
To grant rights to users in a particular role, open the activity, select the Rights tab and click Edit rights. Choose the type of permission you want to grant and then select the user role from the list:
- To make the activity mandatory for users in a particular role, add the role to the Execute right. Mandatory activities that have not been performed are listed as "Required tasks".
- To make the activity optional for users in a particular role, add the role to the Request right.
For more information about adding users to roles and configuring permissions in your applications, see Manage users and permissions.
Add the activity to pages or views
To allow users to initiate a form activity and edit the details of a particular case, add widgets to your application's pages or views:
- To embed the activity form in a page or view, add an activity or inline edit widget to the view of the casetype or page.
- To include an option to edit the details of cases listed in a table (such as existing products, users, or orders), add a grid widget to the view and add the activity as an inline activity on each row.
- To create a custom display element containing an activity, use a template widget or a plugin.
Ensure that the user roles with permission to perform the activity also have permission to view the relevant widgets. For more information about designing views and adding widgets, see Configure pages and views.
By default, the activity name is displayed in widgets. To display a different name, edit the widget label or edit the activity title in a grid widget.
Next steps
To test your new functionality, click the rocket icon to compile your application and then open the Development environment from the Studio homepage or from the information icon.
Once you have provided users with a way to edit case details, you may want to give them the option to view details of existing cases. For more information, see Display content to users.