Perform activities at a fixed time
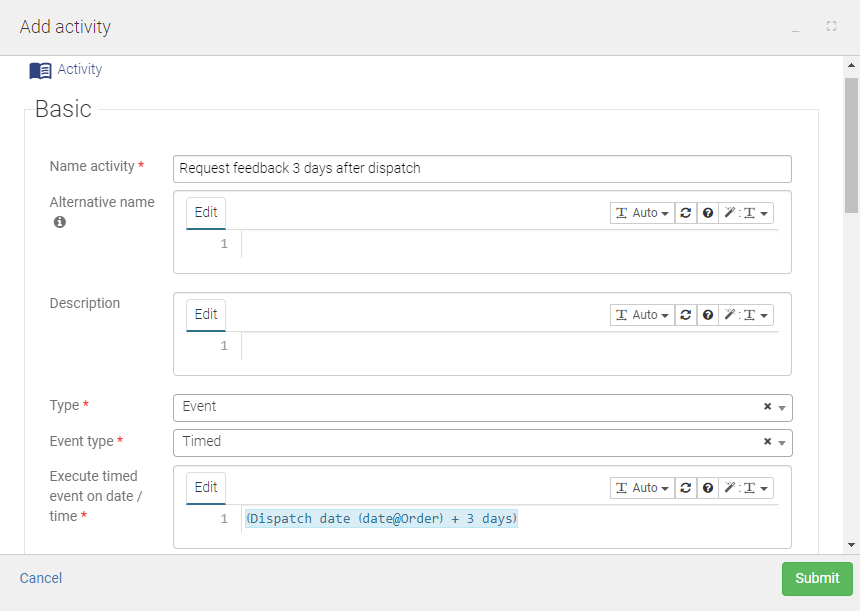
As well as allowing users to perform activities on an ad hoc basis or triggering activities when certain conditions are met, you can configure activities to take place at a specific time. For example, you might want to send a request for feedback 3 days after the delivery date of an order, or generate a mandatory task to ask employees to review and update their details every 12 months.
To schedule activities for a particular point in time, you need to:
- Create a timed event activity with either a relative or absolute date and time.
- Configure an existing activity to trigger the timed event.
- Add triggers to the timed event to initiate other activities at the specified time.
This article is about performing activities once at a specified time. To perform activities regularly on a schedule, use Jobs.
Create a timed event
Before creating a timed event, you need to identify the casetype that you will add the activity to. If you want the timed event to trigger enabling or disabling an optional activity, or submitting or cancelling a mandatory activity, add the timed event activity to the casetype of the activities you want to trigger. If you want to initiate (Execute) or perform (Execute and submit) a mandatory task, you have more flexibility in your choice of casetype. For more information, see Chain activities together.
To create a timed event activity:
- Open the relevant casetype, select the Activities tab and click Add activity.
- Enter a name and then set the Type to Event and the Event type to Timed.
- In the Execute timed event on date/time box, specify the date and/or time of the event using an inline template. This is when any activities triggered by the timed event will start. For example:
- To specify a relative date and/or time, type
date.and select from the list of options. Then, click the blue text to configure the template by setting the start date and the offset. - To use the date from an attribute on the case, type
case.and select from the list of attributes. To reference an attribute from another case, select a case ID attribute and then click the blue text and add a link to an attribute (or metadata) on the referenced case. - To use a value from the case metadata, such as the date the case was created, type
casemeta.and select from the list of metadata.
- To specify a relative date and/or time, type
- Configure other activity options as required. Timed events are usually performed automatically, so there is no need to add user-facing text.
- When you have finished, click Submit. The timed event activity is created.

Configure an activity to trigger the timed event
All event activities must be triggered by another activity. Triggering the event initiates it in relation to a specific case.
For example, if you have configured a timed event for 10 working days after an employee's start date, that timed event must be initiated for a particular Employee case so that it can count the days after the Start date and then trigger other activities. In this example, the timed event could be triggered by the Start employee casetype activity (if the start date is always provided when creating a new employee) or by a form activity used to record the start date.
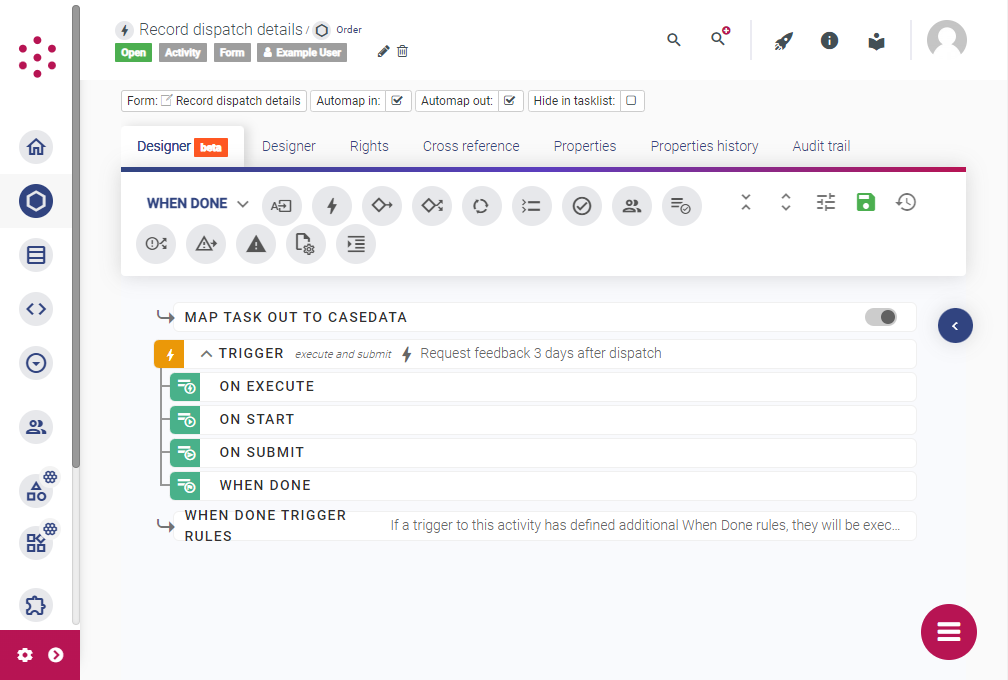
In our request for feedback example, the event might be initiated when the dispatch details for a particular order are recorded in the system using a form activity. The timed event date might be determined using the value from the Dispatch date attribute included in the form.
To trigger a timed event from another activity:
- Open the activity from the casetype and select the Designer tab.
- Select the stage of the activity lifecycle on which you want to trigger the activity:
- To trigger the timed event when a user submits a form, select the
When donestage of the form activity. - To trigger the timed event when a new case is created, select the
On submitstage of the casetype activity.
- To trigger the timed event when a user submits a form, select the
- Add a trigger to the designer canvas and set the Type to Execute and submit.
- From the Activity to list, select the timed event activity.

When the relevant stage of the parent activity is performed, the timed event is initiated automatically. The timed event will remain in the Execute stage until the event date or time is reached, at which point it transitions to Done. If the event date or time is in the past when the event is initiated, the event transitions to Done immediately.
Trigger activities from the timed event
You can add triggers to the When done stage of a timed event to control what happens at the specified time. For example, you might want to send an email to a customer with a link for them to provide feedback, or create a mandatory task for a line manager to book a health and safety assessment for their new employee.
Start by configuring the child activities as normal. Then, add triggers for the activities to the timed event:
- Open the timed event activity and select the Designer tab.
- From the toolbar, select the
When donestage and then drag and drop a trigger onto the designer canvas. - Select the trigger type according to what you want to do. For example:
- If you want to send an automated email to request feedback a few days after an order has been delivered or a service has been provided, use an
Execute and submittrigger for the relevant casetype activity. - To require users to complete a task, such as completing a form or providing details so that an email can be sent, use an
Executetrigger for the relevant casetype or form activity. - To make a (previously disabled) task available for users to initiate from a widget on a page or view, use an
Enabletrigger for the relevant casetype, form or process block activity. The task is made available from the time of the event onwards until it is either submitted or disabled.
- If you want to send an automated email to request feedback a few days after an order has been delivered or a service has been provided, use an
- If you have selected Execute and submit or Execute, use the To type dropdown list to select the parent case of the activity you want to execute. For example, you can execute an activity on a case identified by a case ID attribute or an activity associated with a page in your application, such as the homepage.
- From the Activity to dropdown list, select the activity you want to trigger.
When the time of the event is reached, the timed event activity transitions to the Done stage. The triggers you have added fire and the activities are initiated, performed or cancelled as per the trigger type. For more information about triggering one activity from another, including how to apply conditional logic, see Chain activities together.
You can add mappings to the On start stage of the trigger to populate some or all of the fields on the activity automatically. For more information, see Customize behavior of triggered activities.