Configure forms
To view and create forms for use in activities or widgets, open the relevant casetype and select the Forms tab. Several forms may have been generated when you created the casetype or added activities to the casetype. You can edit existing forms and create new forms from here. To associate a new form with an activity, edit the activity properties.
When creating a new form, you can use the Advanced tab to add attributes to the form. You can also add and change the attributes included on the form when you configure it using the form designer.
To configure a form, select a form and then select the Form designer tab.
If you specify an instruction in the form details, this overrides any instruction that has been configured on the related activity (if applicable).
Form fields and buttons
To add attributes to the form, use the Select attributes list and then click the + icon.
Use the Field icon to add "bare fields" to a form. Bare fields are form fields that are not linked to an attribute on the casetype. You can use bare fields to collect data for use within the form, without recording that data against the case. For example, you might use a bare field to ask if the billing address is different from the delivery address. You might then configure conditional logic so that the billing address fields are only displayed if the answer is "No".
To change the order, size, and position of each form field, drag and drop the fields within the designer canvas. You can display up to 6 fields in the same row, or up to 12 fields with labels hidden.
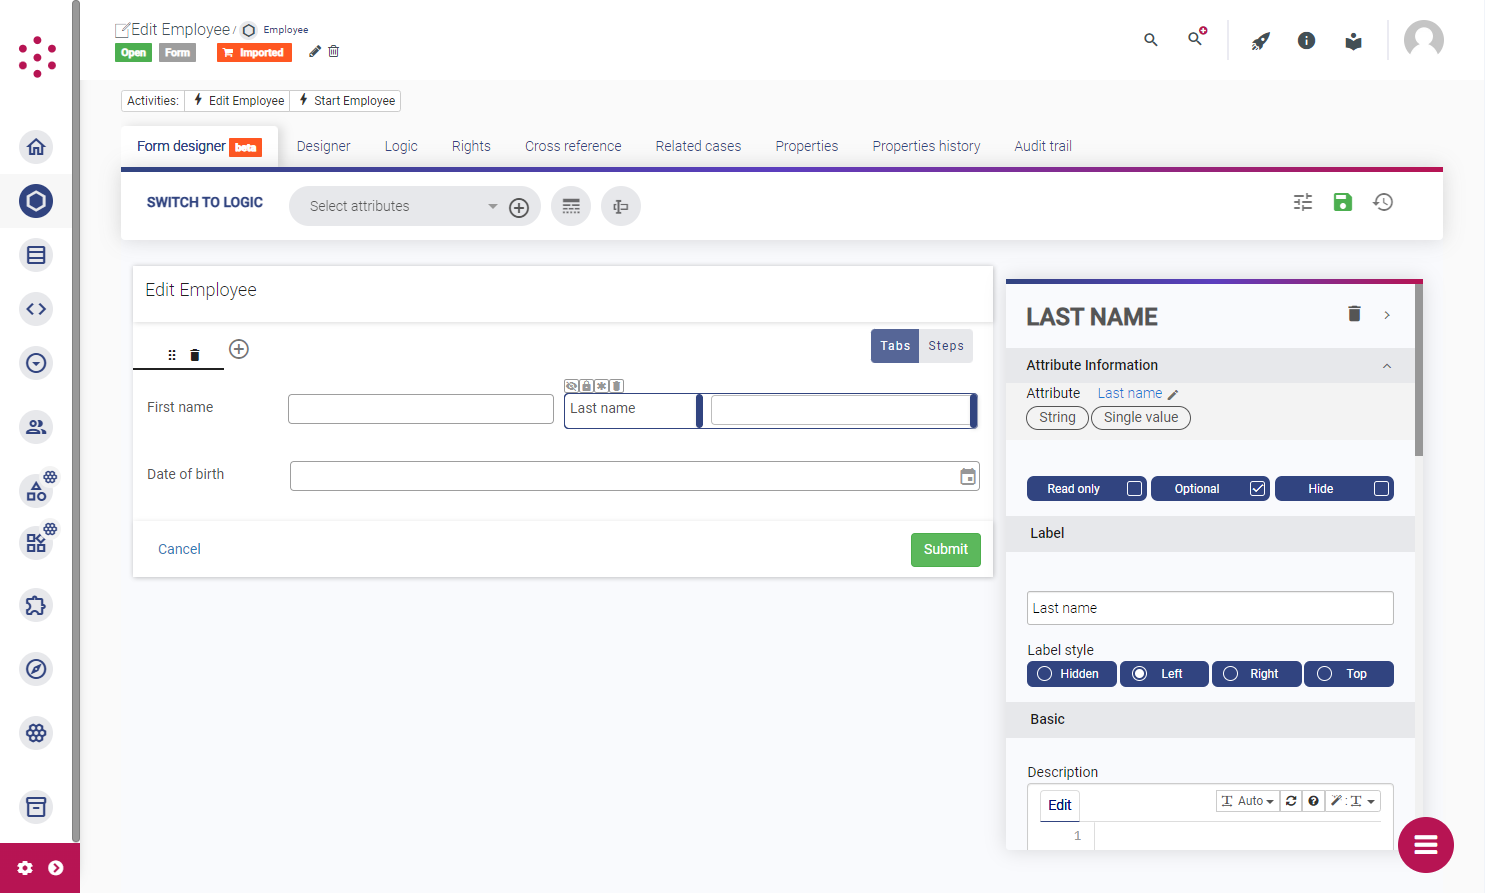
Select each field to view and edit the field properties. From here you can:
- Control whether the field is:
- Read-only or editable
- Optional or mandatory
- Visible or hidden
- Change the field label and its position relative to the field.
- Apply CSS classes to style the field. For more information, see Form styling below.
- Add an instruction, tooltip, or validation rule. For attribute fields, these settings override any settings that you have applied to the attribute. If you do not configure these settings, the attribute settings are applied.
- Provide a picklist so that users can select a value from a list of options. This is useful if you want to apply a picklist to a bare field or re-use an existing picklist for a different attribute in the context of a particular form and activity.
- If the picklist is based on a dataset with a
Current casefilter, you can use the Picklist case base to override that filter. Select a form field that identifies the case ID of the case you want to use as the current case. - To allow users to add a new item to a picklist based on a dataset without having to leave the form, select the appropriate casetype activity from the Add activity on picklist list. For example, if the picklist allows the user to select from a customer's existing orders, you can provide an option to create a new order from the picklist. To perform the casetype activity in the context of a different case, use the Picklist add activity case base list to select the form field containing the case ID that identifies the appropriate case.
- If the picklist is based on a dataset with a
- Depending on the data type of the attribute, you can also configure the field type (such as a multi-line text field or a password field with obscured characters) and specify placeholder text.
Custom buttons
By default, all forms include "Submit" and "Cancel" buttons. You can add custom buttons to a form so that users can perform additional actions or to replace the default buttons. For example, you can add a custom button to allow users to show form fields that are currently hidden or to clear all the form fields. You can also add custom "Submit" and "Cancel" buttons to replace the default buttons on activity forms.
To add custom buttons to a form, click the "button" icon on the designer toolbar. Select the button and then use the properties pane to configure the button label, color, and other details as required. To resize or reposition a button, drag and drop the elements within the designer canvas.
Once you have added a button to the form, click Switch to logic and select On click to configure the button behavior. For more information, see Apply conditional logic to forms.
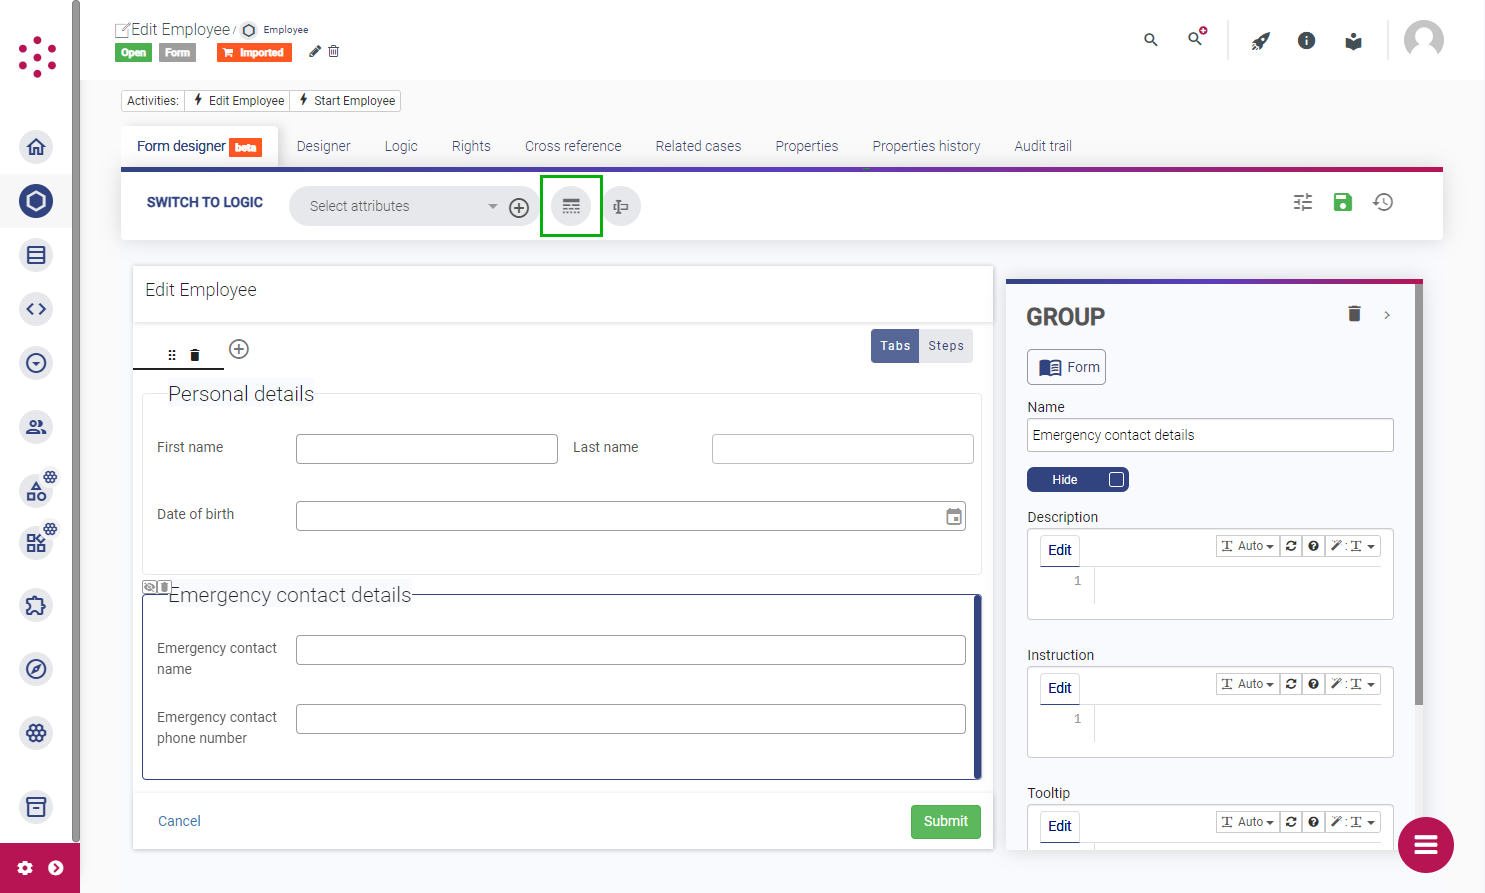
Groups of fields
You can add multiple form fields and/or buttons to a group. You can then apply a label, instruction, tooltip, or CSS class to the group as a whole. You can also apply conditional logic to all the elements in a group. For example, you might want to make all the fields in a group mandatory if a particular condition is met.
To create a group, click the group icon on the toolbar. Then drag the relevant attributes and/or bare fields into the group and adjust the layout as required. Select the group to edit the label and other properties.
Tabs and steps
You can split forms into multiple pages using tabs or steps. This is particularly useful for larger forms, as it allows you to break the user journey down into manageable chunks.
To add tabs or steps to a form, click Add a tab and then use the toggle to select either tabs or steps.
- Tabs allow users to complete the form in any order. Any validation is only applied when the form is submitted. If you are applying conditional logic to the form, avoid changing the contents of one tab based on the data that users enter in another tab, as this can be confusing if a user does not complete the form in the expected order.
- Steps require users to complete all mandatory fields before they can proceed to the next step. The fields on each step are validated when the user clicks Next to advance to the next step. The fields on the final step are validated when the user clicks Submit. Steps are useful when designing longer forms that contain conditional logic.
To reorder tabs or steps, click and drag them in the designer. If you delete a tab or step, the content of that tab or step is also deleted. If you delete the last tab or step, the remaining fields are moved to the single-page form.
Form styling
You can apply a CSS class from your platform CSS to the whole form or to individual fields in the form. If you are using a form in a widget, any CSS classes applied to the widget or view will override the form CSS.
Unless otherwise specified by your platform CSS, forms are 860px wide by default. To define the width of a form without adding platform CSS, edit the form details and select the Advanced tab. In the CSS classes field, add one of the following classes:
form-normalto make the form 860px wide.form-wideto make the form 1260px wide.form-extra-wideto make the form 1660px wide.
For more information about configuring platform CSS, see Style your application.
Next steps
If you have configured a form for use in an activity, you may want to add mappings to the activity to populate some of the form fields automatically. If you have configured a form to display data in a view, add the appropriate widget to the view and then select the form from the widget properties. You can also apply conditional logic to forms to change the visibility of fields and other settings.