Configure pages and views
In Grexx Platform, you add webpages and content to your application using pages and views:
- Pages are a single instance of a page casetype. Page casetypes are designed for creating unique webpages within your application, such as the homepage, a dashboard, a user management page, or a configuration page. For each page casetype, you can configure one or more views.
- Views are a presentation of an individual case. For standard casetypes that represent things (such as a
Customer,Product, orOrder), a view provides a template for displaying the details of each case. For example, a view for aCustomercasetype would define the content and format of the webpage that displays each customer's details. For page casetypes, the view is simply the representation of the page.
Once you have defined your standard casetypes and/or created page casetypes as required, you can design views for each casetype, as described below.
The view designer includes a drag-and-drop editor and configurable display elements (known as "widgets") to help you build your user interface quickly. You can also create your own widgets (or ask for assistance in doing so from your Grexx Coach) and apply your own styling to customize the look and feel of your application.
Add pages to your application
To add an individual page to your application, such as a homepage, configuration page or user management page:
- From your Studio, select Casetypes and click Add casetype.
- From the Add casetype dialog, enter a name for the page and set the Type to Page.
- By default, the URL of each webpage in your application uses the case ID as the slug (in the format
https://your-app.grexx.today/page/case-ID). To set the URL slug for the page, enter the slug in the Alias box. For more information, see Configure page URLs and titles. - When you are ready, click Add casetype. The page casetype is created.
You can now design one or more views for the page, as described below.
Unlike standard casetypes, there is always one case (and only one case) for each page casetype. The case is created automatically in each DTAP environment. This means you do not need to add activities to create pages as you do for standard casetypes.
Design views for pages and standard casetypes
For both pages and standard casetypes, you control what is displayed to users using views. A view is made up of containers and widgets:
- Containers control the layout of the webpage.
- Widgets define the content that is displayed and the user roles that have permission to view that content.
Every casetype is created with a default view called Main. You can also create additional views for use in specific circumstances, as described below.
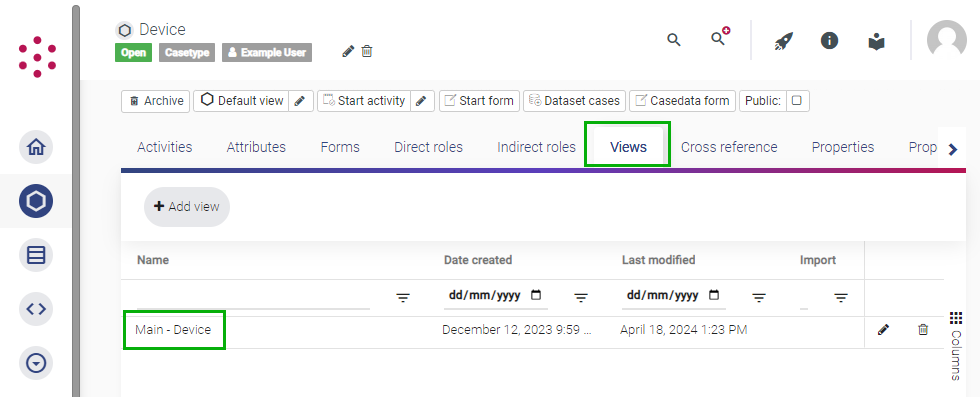
To create or edit a view, open the relevant casetype and select the Views tab. Click the view name to open the view designer.
Add containers to a view
Containers allow you to set the relative size and position of widgets using a 12-column responsive grid. Each container can hold one or more widgets. You can add containers manually from the view designer toolbar. If you add a widget without selecting a container first, a new container is added automatically.
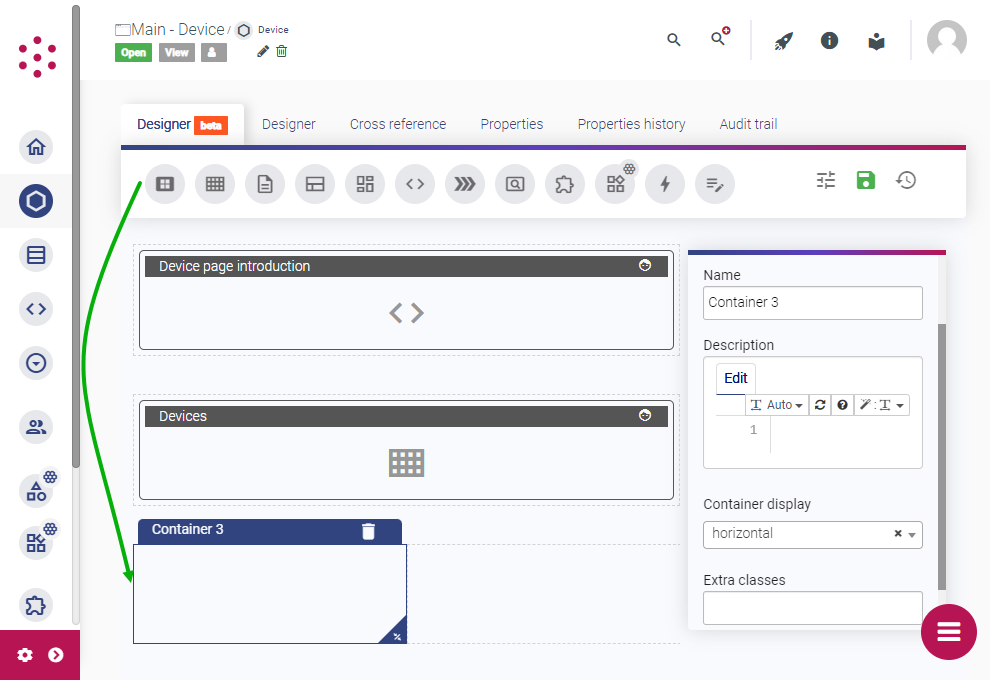
Once you have added a container to a view, drag and drop to resize it and set the position. Use the Container display options to control how widgets are laid out within the container:
- Horizontal: Lays the widgets out alongside each other.
- Vertical: Lays the widgets out one above the other.
- Tabs: Displays the widgets on separate tabs.
- Use the Tabs position options to control the position of the tabs within the container.
- If only one tab is visible (for example, because the user only has permission to view one of the widgets), the widget is displayed without the tab. To change this default behavior, enable Show single tab.
- Use each widget's Label field to control the text displayed on each tab. If you do not enter a label, the widget name is used.
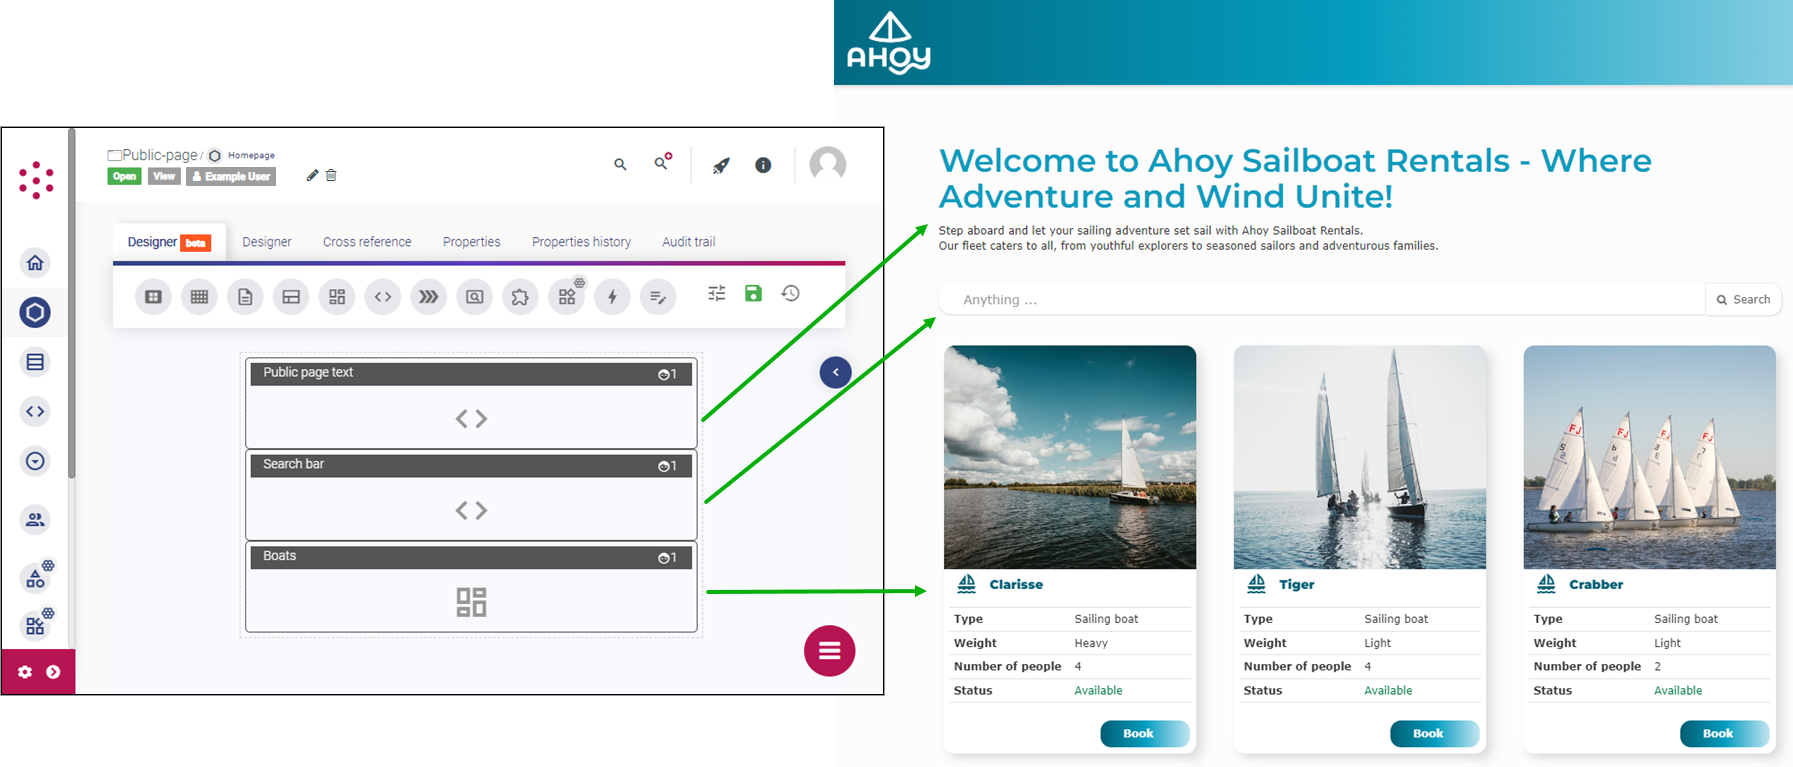
You can then add widgets to your containers to display text, images, details of cases, activities (as buttons, links, or inline forms), search bars, and more.
On smaller screen sizes, containers and widgets will reposition automatically. You can test how different containers and widgets behave by opening the Grexx Platform UI gallery and using your browser's developer tools to view the webpage in responsive mode.
Identify suitable widgets
Widgets allow you to add content to a view and control who can see that content. For example, you can use widgets to display static text and images, details of cases, navigation options, buttons, links, and other calls to action.
Grexx Platform includes a number of widgets designed to address common use cases. You can use these widgets to display:
- A list of cases or activities: Use a grid widget to display a table containing cases or activities identified using a dataset. You can include options so that users can perform activities on the rows in the grid (such as editing case details or closing a case), edit fields inline, or create new cases or activities. Users must have permissions on the activities in order to use these options.
- Details of cases or activities in a custom format: Use a tile widget to display details of cases or activities on individual "tiles". As with a grid widget, you use a dataset to identify the cases or activities you want to display. You define the layout of the tiles using a template. This gives you more control over how the data is presented and allows you to include images (such as product photos) for each item.
You can combine a tile widget with a form search widget to allow users to filter the cases or activities within the view. - Details of the current case: Use a casedata widget to display case data in a form configured on the casetype. For example, you might want to create a view for the
Employeecasetype that includes each employee's name and contact details. You can either use an existing form or create a dedicated form to specify the attributes you want to display and the layout of the fields.
You can also use a view widget to embed a view of the same casetype in the current view. This is useful if you want to manage some of the content in a separate view so that you can reuse it in several places. - Details of a related case: Use a view widget to embed a view from a related casetype in the current view. You can either use the
Mainview for the related casetype or create a dedicated view for this purpose. For example, in the view for anInsurance claimcasetype, you might want to embed a view from the relatedCustomercasetype to display a summary of the customer's details so that users can refer to this easily while reviewing claim details.
To embed a view, use the Pointing attribute list to select the attribute on the current casetype that identifies the related case. Then, select the view that you want to embed from the View list. - A form for an activity: Use an activity widget to display the form for an activity with the current case data (or simply a "Submit" option for activities without forms). For form activities you can also use an inline edit widget to display the current case data with an edit button alongside each field. Users must have permissions on the activity to be able to submit the form or edit the fields.
- Navigation breadcrumbs: Use a breadcrumb widget to show the current position in the navigation hierarchy. You can also add a navigation bar to your application to enable users to navigate to different pages within your application.
If these standard widgets do not meet your needs, you can also:
- Take advantage of widgets created by other Grexx Platform users by importing a plugin from Grexx Marketplace. For example, you can use a plugin to display a map, calendar, or chart populated with data from a dataset.
- Build your own custom widgets using a template widget. By configuring templates you can display static text or images, add buttons or links (such as a "Home" or "Back" button), and create custom UI elements. As with standard widgets, you can use a template to display data from the case or a dataset. You can also use HTML and import a library such as Bootstrap to apply styling easily. If you need assistance, please contact your Grexx Coach.
To browse examples of widgets in action, including templates and plugins, see the Grexx Platform UI Gallery.
Add widgets to views
To add a widget to a view, use the appropriate option on the view designer toolbar. If you have selected a container, the widget is added to that container. If no container is selected, the widget is added to a new container.
Select the widget to configure the settings, including the relevant dataset, activity, or form.
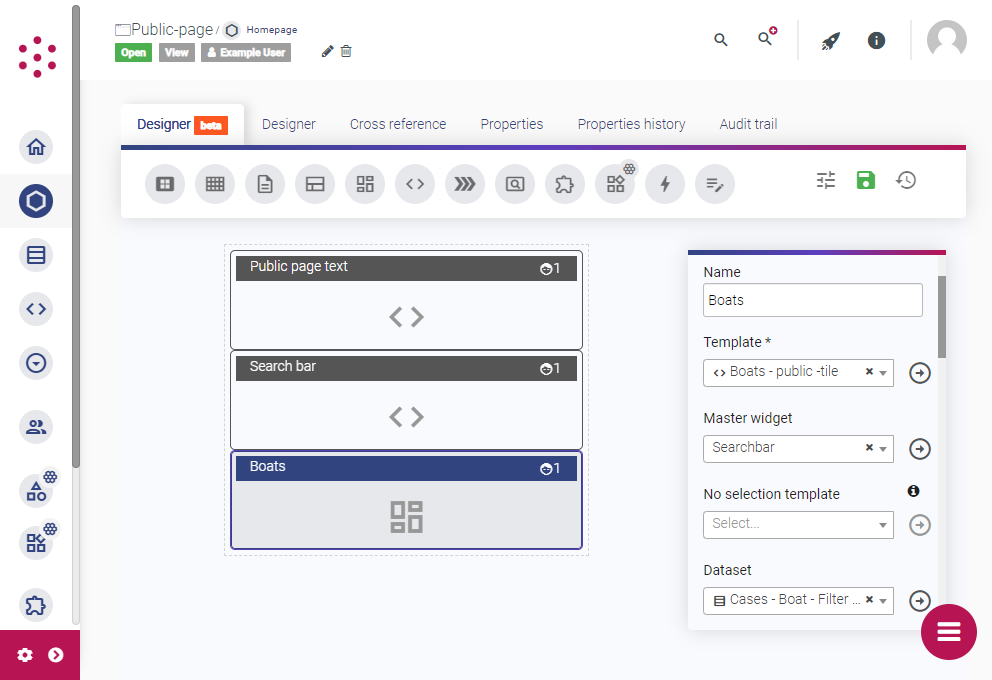
For each widget, you can specify a Label, Header, and/or Footer to be displayed alongside the widget. You can include plain text, HTML tags (such as <h2> or <em>), and inline templates in these fields. If you have applied a CSS template to the view, you can specify the CSS classes for a widget in order to apply the relevant styling.
By default, the content of a widget is only refreshed when the user refreshes the page. To refresh the data displayed in a widget automatically, set a Refresh interval. For example, if you set the interval to 30, the widget will be reloaded every 30 seconds. This is useful if you are displaying data that may change while a user is viewing the page and you want to ensure that they always have the latest values.
If the data displayed in one widget depends on another widget (such as a tile widget displaying cases or activities based on the user's selection in a form search widget), select that widget from the Master widget field.
For more information about configuring specific widgets, refer to the relevant widget reference.
Manage visibility of content
Once you have added containers and widgets to a view for a page or standard casetype, the next step is to manage who can see those widgets. You can also apply conditions to control when widgets are displayed.
Set widget permissions
By default, users are not granted permission to see any of the widgets that are included in a view. For each widget, you must specify the user roles that have the right to see the content that it contains. This gives you fine-grained control over who can see what in your application.
To give users permission to view a widget, grant rights to one or more user roles:
- From the view designer, select a widget to display its properties.
- In the right-hand panel, scroll down to the Rights list.
- From the list, select the roles that you want to grant permission to view the widget. You can select multiple roles if required.
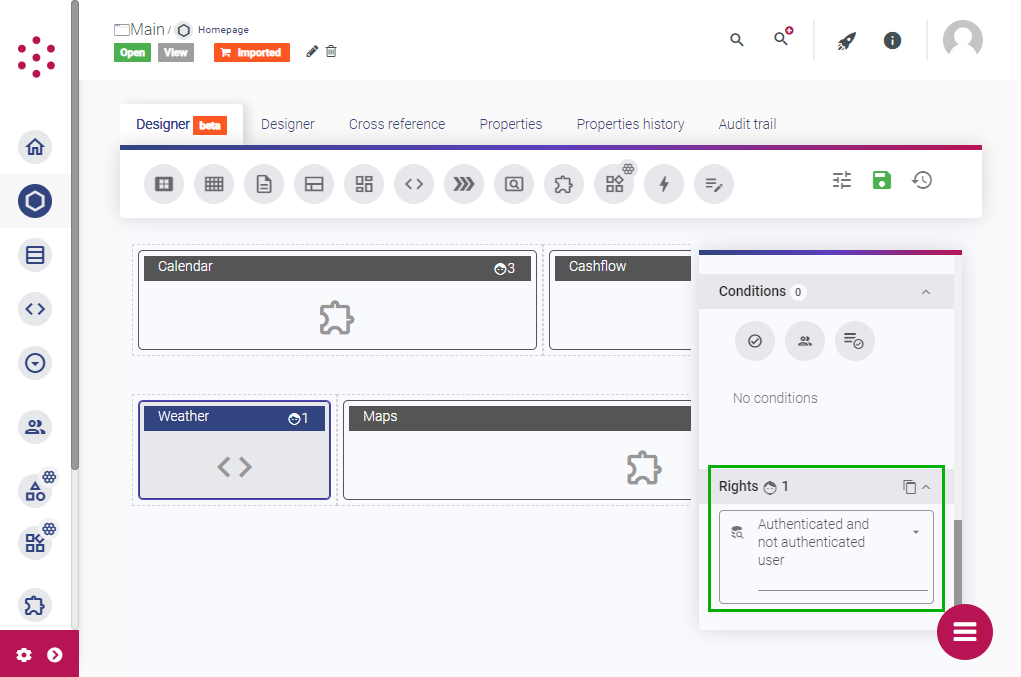
When you deploy your application to any of your DTAP environments, users in the specified role(s) can view the widget. If no role is granted rights to view the widget, the widget is not visible to anyone. For more information about configuring rights and roles, see Permissions. For more information about making content visible to anyone, see Create a public page or view.
If a widget contains an option to perform an activity (such as editing a case in a grid or tile widget), the user roles with permission to perform the activity should also be given permission to view the widget. Otherwise, users in the role will not be able to initiate the activity from the view.
To give users permission to view case details without editing them, grant the user role permission to view the widget but do not grant permission to perform the associated activity.
Conditions for displaying widgets
You can use conditions to control when a widget is displayed to users. For example, you might want to display details of an expense claim in a form widget only if the value of the claim is below a certain threshold. You can achieve this by comparing the attribute to a template, which you use to define the threshold value.
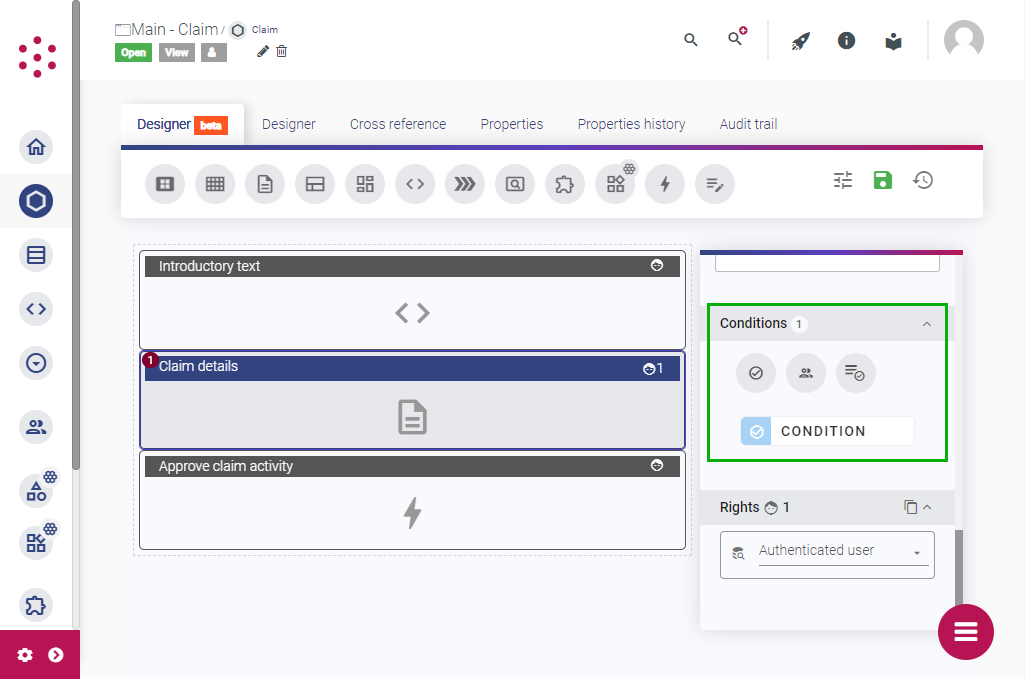
When conditions have been applied, a widget is only displayed to users in the role with rights to view it if those conditions are satisfied. To apply multiple conditions and only require one of them to be met, use a condition list and set the type to Or.
Conditions should not be used as a substitute for granting permissions to view a widget.
Default and alternative views
You can create additional views for both standard and page casetypes. This is useful if you want to embed a view of the page in another page or view (using a View widget), or if you want to configure an alternative view for users that have not logged in.
The default view for each case is accessible by appending the case ID or custom URL path to your application URL. For example, to access the default view of a particular Customer case in your Development environment with case ID 1:1234:9876, you might navigate to https://myapplication-dev.free.grexx.today/1:1234:9876 or to https://myapplication-dev.free.grexx.today/customer-9876.
To change the default view for a casetype, edit the casetype and select another view from the Default view picklist.
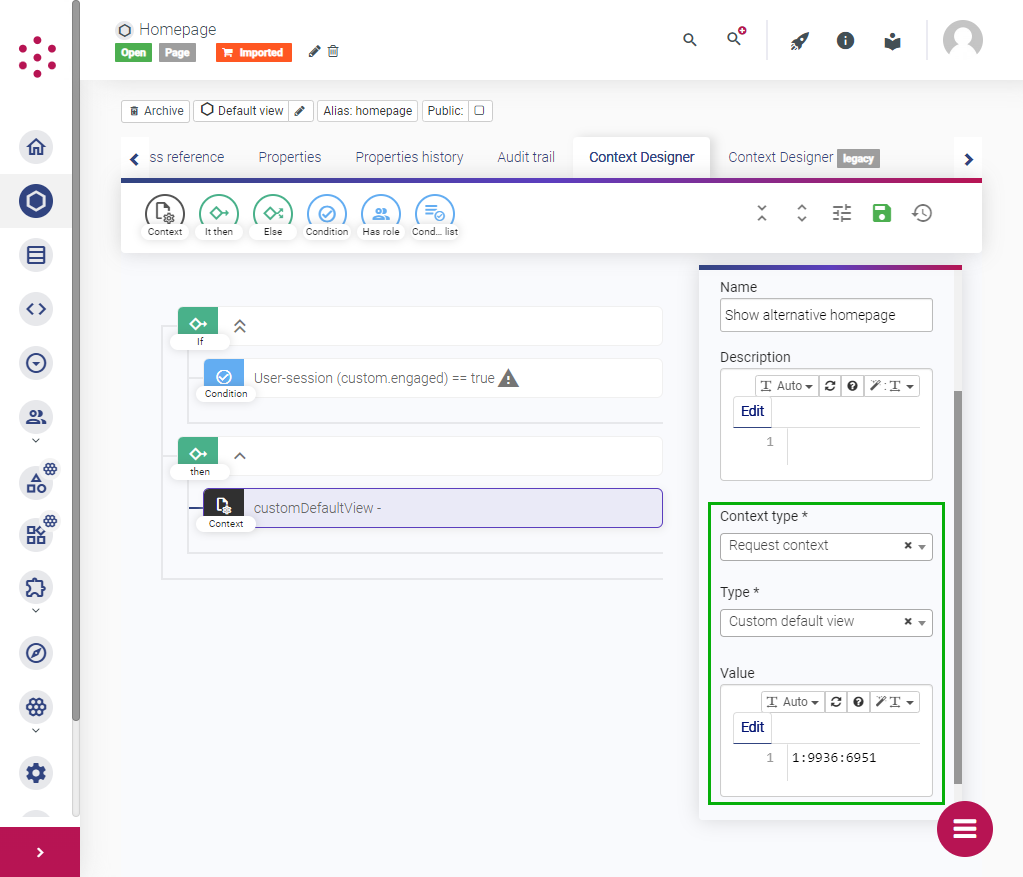
To change the default view only when certain conditions are met, use the casetype context designer:
- From your Studio, open the casetype and select the Context Designer tab.
- Add an
If thenblock and add conditions to theIfstatement to specify the circumstances in which you want to apply a different default view. For example, to change the default view based on a value in the current user's session, add a condition and use an inline template to identify the custom user session key. - Add a
Contextblock to theThenstatement and set the Context type to Request context. - From the Type picklist select Custom default view.
- In the Value box, enter the case ID of the view. To find the view case ID, open the Views tab and enable the CaseID column.
Redirect views
If you do not want the view(s) for a casetype to be accessible, you can redirect users to another view, system, or external URL. This is useful for casetypes that form part of a larger process or concept.
For example, a claim review process might involve multiple casetypes that represent different levels of approval. If you are collating all the details from these cases in the view of the main Claim case, you may want to prevent users from accessing the views of these related cases.
To redirect all views for a particular casetype to another location, open the Edit casetype dialog, select the Advanced tab, and in the Redirect field either use an inline template to identify a view of a related casetype or enter an external URL.
Next steps
Once you have configured views for both your page casetypes and standard casetypes as required, you may want to customize the page URLs and titles before adding a navigation bar so that users can navigate between the pages in your application. You can also configure CSS and/or themes to customize the appearance of your pages and views.